 |
| This is a one gallon milk jug after the activity. It's all caved in now! |
Activity Overview:
In this changes in states of matter activity, boiling water is added to an empty milk carton. Once sealed, the milk carton significantly contracts and crumples in on itself. The activity shows students two changes in states of matter (vaporization and condensation), and with the right questions, it gets your students thinking about and discussing particle movement in the different states. If done as a demonstration, it takes approximately one 45 minute class period. If done as an experiment, it could take two 45 minute class periods.Needed Supplies:
One of the best things about this activity is that it requires minimal supplies and all of those supplies are inexpensive and easy to find. Here’s what you need:- An empty one gallon milk carton with its lid: While it’s possible to use other containers and container sizes, I recommend using a regular ol’ plastic gallon size dairy milk carton. I’ve used half gallons and that size doesn’t really show a whole lot of crumpling. Other plastic cartons can be too rigid and don’t show the crumpling at all. And some cartons might even melt and get all gooey and messy on you. Plus they can give you some nasty burns. So yeah, just use a gallon milk carton.
- Water: Different amounts can be used, but I’ve found that 1.5 liters works best. Don’t use less than 0.5 liters and don’t fill the carton more than halfway.
- A heating source to boil the water: I like using a hot plate because students can easily see the bubbles and steam coming off of the water as it’s boiling. You can use an electric kettle or a microwave or a Bunsen burner. Or you could even go caveman and build a big bonfire in the middle of your classroom. Just kidding. Please don’t do that.
- A heatproof container to boil the water: Because you can’t boil water without one.
- A funnel: It’s optional, but can be nice to have when pouring the water into the carton. Plus you can wear it as a hat when you’re not using it.
- An ice bath: No, it’s not for you to sit in. The ice bath is optional, but can be used as another part of the activity.
- Safety materials: It’s always important to model laboratory safety.
Demonstration Instructions:
This activity can be used as a demonstration or an experiment. In my class I’ve always used it as a demonstration because 35+ middle school students all messing with boiling water at the same time in a classroom that’s not really set up for laboratory purposes didn’t sound like a good time.Here are some demonstration directions you can use:
- Review the changes in states of matter with your students.
- Explain to your students that you will be boiling water, adding it to an empty milk carton, and sealing the carton with the lid.
- Have students make predictions about what will happen to the carton.
- Begin heating the water. While the water is heating, ask questions about what is happening to the water particles and what change in state of matter is occurring and why. It’s vaporization, ya’ll.
- Once the water is boiling, carefully pour it into the empty milk carton. Use a funnel if you have one or skip it if that’s how you roll. Immediately put the cap on the milk carton. Make sure it’s on there tightly.
- Have students observe the changes and make observations about what they see. Ask them to try to explain why this is occurring. (Here’s why the carton crumples: As temperatures increase, air pressure and air volume increase too. As temperatures decrease, air pressure and air volume decrease as well. The difference between the air pressure on the inside and the outside of the carton along with the decreasing volume of the cooling gas inside of the carton cause the carton to collapse.)
- If you have an ice bath prepared, now’s the time to place the carton in the cold water. The cold water will increase the speed at which the carton crumples. If you don’t want to do the ice bath part, well that’s just fine and dandy. Skip it and move on to the next step.
- Point out the tiny droplets of water on the insides of the carton. Ask students to explain where those droplets of water came from and why they are there. (Condensation.)
- Discuss the activity and the changes in states of matter with your students. Maybe have your students draw the particle movement during each part of the activity.
- That’s it. All done.
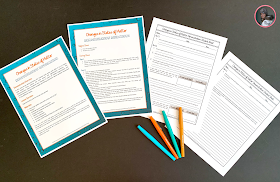
My Changes in States of Matter Demonstration is in my store. It has full directions, student sheets with many discussion questions, and an answer key. Get my Changes in States of Matter Demonstration here.
Experiment Ideas:
Like I said, I do this as a demonstration. Because, you know, 35+ middle school students playing in boiling water can be a titch terrifying. Even if they aren’t actually playing in the boiling water. That’s just what I envision happening when I think about my students doing this activity as an experiment. But, some teachers are fortunate enough to have smaller class sizes and a classroom that is setup for this kind of thing.Here are some experiment ideas:
- Test which amount of water causes the milk carton to collapse the most.
- Test different container sizes to see which collapses the most.
- Test different container materials to see which carton collapses the most. (Test the materials yourself first to make sure there aren’t any melting issues.)
- Try placing the filled cartons in different locations to see which causes it to collapse the fastest. (Think: refrigerator, freezer, ice bath, sunny windowsill, under a fluffy towel, on a table…
Well, I hope you and your students enjoy this activity. Remember, my Changes in States of Matter Demonstration is available in my TPT store and comes with full directions, student sheets with plenty of thought-provoking questions, and an answer key.
If you want more materials for your changes in states of matter unit, check out my Changes in States of Matter Bundle. It has interactive notebook pages, bell ringers, activities, stations, projects, worksheets, and an assessment. Woo-hoo! If you're looking for a workbook, check out the Changes in States of Matter Physical Science Workbook for Middle School available on Amazon! Learn more about the workbook. As an Amazon Associate, I earn from qualifying purchases.
As a science teacher, you might be interested in my email list. Click here to subscribe. Just for signing up you'll receive an exclusive freebie you can't get anywhere else.


