This blog focuses on teaching middle school students and provides resources for teachers to use in their classrooms.
Back to School Site-Wide Sale on Teachers Pay Teachers!
Great news! Teachers Pay Teachers is having a two day sale starting tomorrow. Get ready for back to school and stock-up for the year ahead. Everything in my store will be 20% off. Most other stores will have sales going on as well. Remember to use the code "BestYear" when you checkout so you can get even more savings.
Away for a Little While
Hello! My family and I are going on a canoe trip in Canada for the next week and a half, so I will be away from all technology. If you send a message or ask a question on the blog I will respond when I get back. Enjoy your July and thanks for reading!
Successfully Using Stations in the Middle School Classroom
I’ll admit, when I first began using stations the main
reason was so I didn’t have to make copies for 200 students. The copy
machines at my school were frequently broken, out of toner, and often
inaccessible due to high need from other teachers and the lack of regular and
predictable planning periods. If I wanted to make copies, I either had to get
to school around seven or stay well after the final bell rang. Even then I might not be able to print what I
needed for my students because the paper might be locked away to save the
district some money. Stations were a perfect solution to my copy machine
dilemmas. However, once I began using stations I found many more reasons to keep using them in my seventh grade science classes. Perhaps most importantly, students
love stations and are motivated simply because they can be out of their seats
and be more in charge of their learning (more on that later). Stations are
super easy to differentiate and can be used to meet the needs of all of your students.
Also, they are easy to use and quick to set up. If you’ve never heard of
stations, ever considered using stations, or if you currently use stations and
they aren’t quite as effective as you’d like, keep reading.
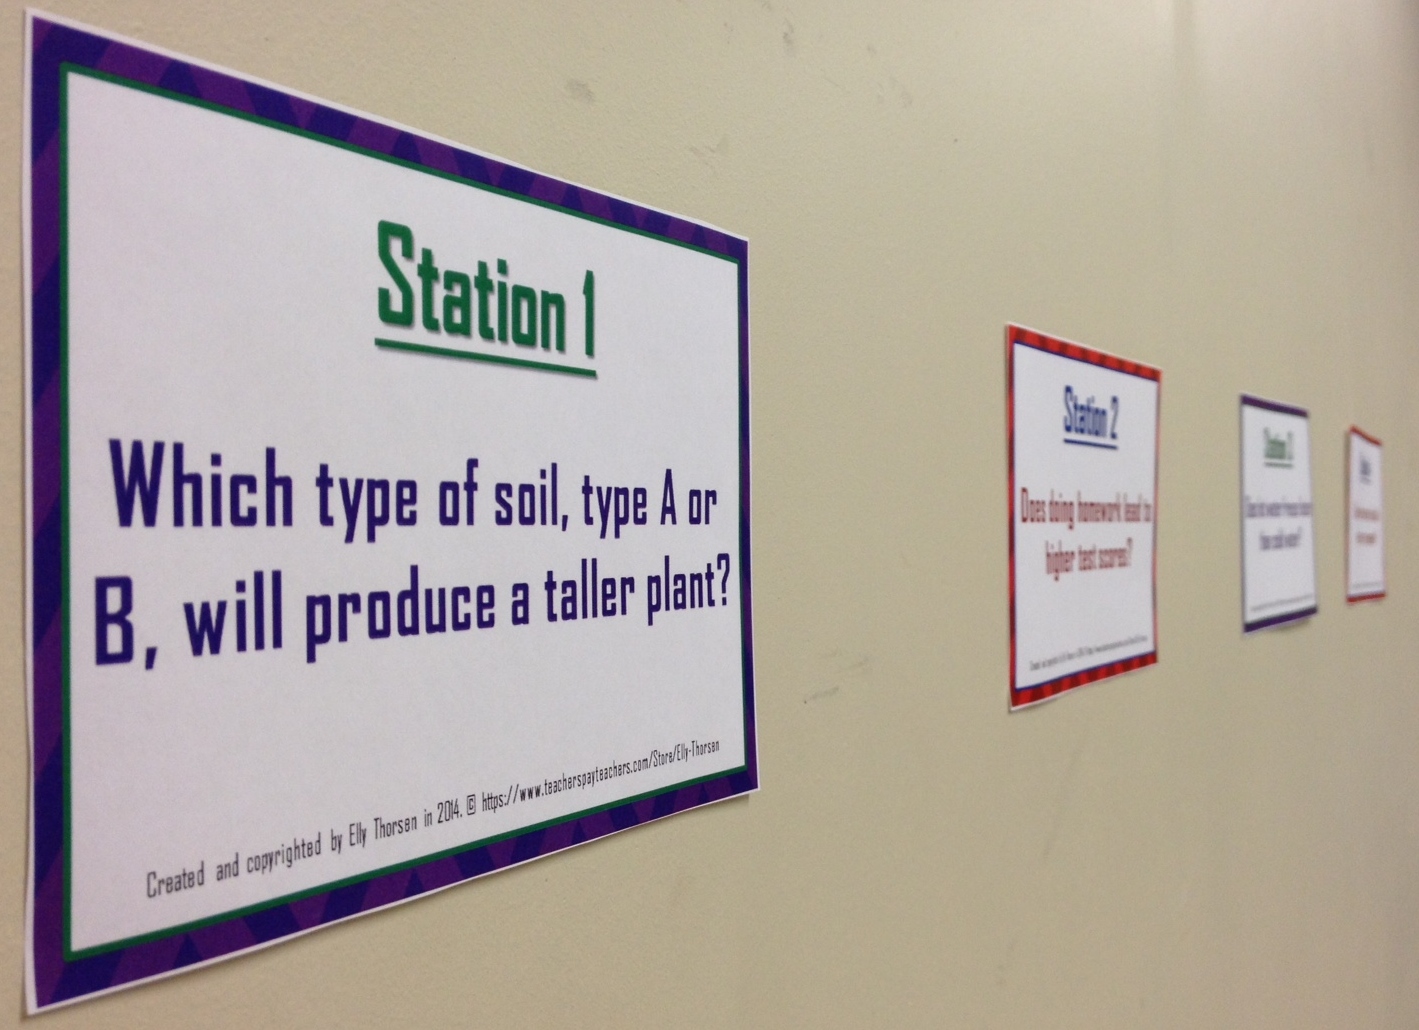
| Students practice identifying variables and writing hypotheses with these Scientific Method Stations. |
What are stations?
Stations are a way for students to practice lesson content
while moving around the classroom instead of being seated at desks. (That might
sound scary when considering certain classes—believe me, I’ve been there.
However, I’ve used stations with even my most rambunctious, out of control
classes of 35+ seventh grade students. It can be done successfully.) Stations
can be questions or short tasks posted on the perimeter of the room. In my
science classes I typically used questions that could be answered with students’ notes, textbooks, knowledge, or skills. I included a
variety of question levels—some easy and straightforward and others rigorous
and challenging. I have also set up measurement stations with tasks to complete
such as finding the volume of an object using the water displacement method or predicting
the mass of an object and then using a balance to see how close their
predictions were. When I noticed students had a hard time finding information
in textbooks, I had stations where students had to find a specific piece of
information using glossaries, tables of contents, or indexes. I’ve even cut up
a worksheet and posted it around the room as stations. Answering the questions
on a worksheet can be tedious, but when that same worksheet is in station form
it becomes more engaging and meaningful.
When students are up and around the room doing stations they’ll need to record their
answers. This can be done on notebook paper that they hand in when they’re
finished or in their interactive notebooks.
How do I set up stations in my classroom?
Start off by writing the questions or tasks you want your
students to answer. Use fairly large font so they are easy to read from a
distance of several feet. Then print them out and cut them up. If you want, you
can laminate them so they are in good condition by the time the last class of
students goes through them. I personally
did not laminate them, so I always had some rips or pencil marks on the papers
by the end of the day. Instead of laminating I just used extra tape to prevent
the majority of damage.
Once you have your stations printed, cut out, and maybe
laminated you can tape them around the room on walls, windows, or tables.
Finding space in my classroom was always easy because my room was ginormous. I
also had countertops bordering the walls of three-quarters of my classroom. The
space you leave between stations obviously depends on how many stations you
have, but whenever possible try to leave at least a yard between them. This helps the
students stay focused on their task instead of socializing with nearby
groups. It also helps the teacher spot
misbehavior earlier and sprout fewer gray hairs.
When should I use stations?
There were two purposes for using stations in my classroom:
practice or review. If I was using the stations as a way to reinforce the
material we learned, I scheduled them after taking notes and doing a whole
class practice. Basically, I wanted my students to have the fundamentals down and
the ability to be decently independent before beginning stations. If
students needed to review material, I typically used stations as a review activity
the day or two before a test.
I’ve also had luck using stations before big breaks like
Thanksgiving break, winter break, spring break, or summer vacation. Whenever
students are especially squirrelly, stations are usually a good choice because
students can move around the room and still engage in the material they need to
learn and understand instead of wasting learning time. (Stations have kept me sane on more than one
occasion before a break.)
What behavioral expectations should be established before beginning stations?
Before beginning stations, you MUST go over your behavior
expectations. Otherwise, the students have a 95% chance of turning feral within three minutes. Here are the station
expectations I went over every time we did stations.
- Students will have no more than three students to a station at any time. If there is already a group at that station, then they must go to another station.
- Students do not have to go in order. They may skip around to any station as long as they write their answers in the correct location on their own papers.
- As long as students are on task and working, students may pick the student(s) they want to work with. Students may also work individually.
- Students will receive only one warning for off task behavior. If they are off task a second time, they will have to complete the assignment individually in their seat using a worksheet form of the stations.
- Students may only visit the answer sheet twice during the stations.
- When students finish the stations they need to check all of their answers and return to their seats.
How do I monitor behavior during stations, and what do I do about misbehavior?
If you aren’t directly supporting a group of students, walk
around the room and monitor behavior. Keep an eye and ear out for horseplay.
Whenever students misbehave or don’t follow a station expectation give them a
warning. If students have a second problem, direct the offending students back
to their seats and give them a worksheet form of the stations to complete individually.
Remind students they cannot get out of their seats for the remaining station
time, otherwise you might find them messing with their friends and wandering around the room “working on the
stations.” Depending on whether your stations consist of questions or tasks,
your students might not be able to do every station on their worksheet. In that
case instruct them to skip the station or complete it individually later on.
Biggest advice here: don’t let small misbehaviors get out of
hand. Immediately give the warning/consequence and briefly explain to the
student what they did wrong and why it’s a problem. Here is an example of how
that might sound: “Billybobjoe, you were visiting another group again. When you do
this it is distracting to other students and you can’t learn. Because you
didn’t follow the station expectations, now you will finish the stations at
your desk by yourself on this worksheet.”
How can I use stations to meet the needs of all of my students?
Stations are excellent for differentiation purposes.
Students can choose what works for them. For example, I let my students
determine if they wanted to work independently, with a partner, or in a group of
three. They also determined the order in which they completed the stations. They
could skip around or go in numerical order while working at their own pace. Posting an answer
sheet gave my students support by allowing them to check their work or get help with
a problem they were struggling with. While my students were working, I was free to
meet with a small group of students who needed extra support. Sometimes I determined ahead of time who should be in that day's support group and other times I left it up to the students to come to me for assistance.
| Consider posting answer sheets (like I did with the Changes in States of Matter Stations) so students can check their work and get assistance if needed. |
Another way to differentiate is by arranging the stations from easiest to hardest. For
the most part, students are pretty good at determining their levels of understanding.
Whenever I arranged the stations this way, I explained it to my students and
let them choose where they needed to be. Providing the right context and
reasoning is important for this. Don’t just say: left is easy, center is
medium, and right is hard. Then you’d have a flock of students on the left with
no one really benefiting. Explain that the stations on the left side are for
students who feel they are having difficulty with the content and need to build
up their knowledge and skills first. The stations in the center are a medium level of
difficulty for students who feel they have a fairly good understanding of the
content and are ready for reinforcement practice. The stations on the right
side of the room are for students who feel they understand the material very
well and need a challenge. When I explained it this way, my students didn’t feel bad
if they were on the left side. As for the right side, many were eager for a challenge and would start by looking at the questions to see if they were ready or needed to go more towards the center.
When arranging by level of difficulty, give your students a
number of stations to complete. If there are 30 stations, maybe have them choose
any 10. Having students complete all of the stations can defeat the purpose of
arranging them this way.
What do I do when students finish the stations at different times?
There are several solutions to this. You can set a timer and
have students complete as many stations as they can in 20 minutes. If there are a small number of stations or if
the questions/tasks are relatively quick to get through, you can start a five-minute
timer after the first five students finish; then announce that everyone needs
to be done in less than five minutes. You can have students begin their
homework or an individual class assignment at their seats. They can read a book. I’ve
tried all of these methods in my class and switched it up depending on the student
or lesson needs.
What stations do you use in your own classroom?
I'm so glad you asked. :) In my Teachers Pay Teachers store you can find many of
the stations I have used in my seventh grade science classroom. Currently, these
are the stations in my store:
- Scientific Method Stations: These can be used in a variety of ways. Most often my students used these stations to identify independent and dependent variables and write hypotheses.
- Changes in States of Matter Stations: These stations give students practice with the key points of melting, freezing, vaporization, condensation, and sublimation.
- Genetics and Heredity Stations: These stations give students practice with a variety of genetics topics. They are great to see what students know or to review key concepts.
- Human Body Organ System Stations: Students practice the important characteristics of the skeletal system, circulatory system, respiratory system, muscular system, digestive system, and nervous system.
- Properties of Matter/Physical Science Review Stations: I use these stations to review physical science concepts before the unit test. They go over atoms, states of matter, changes in states, physical and chemical changes, law of conservation of mass/matter, homogeneous and heterogeneous mixtures, elements, and compounds.
- Measurement in Science Stations: These stations are all about the tools and units used to measure metric length, volume, mass, and density.
- Density Stations: My students always need extra practice with density before things really sink in. These stations help them understand.
- Volume Stations: These stations focus on finding the volume of solids and liquids and measuring correctly.
- Mass and Weight Stations: Students get practice with the difference between mass and weight with these stations.
If you haven’t already, try using stations in your
classroom. With the correct implementation, they can really benefit your
students. Plus, you don’t have to make a bazillion copies ;)
Are you a middle school science teacher? You might be interested in my newsletter. Sign up for my newsletter here. Just for signing up you'll receive an exclusive freebie that you can't get anywhere else.
Ways to Grow as a Teacher in a Secondary Classroom
In my classroom, I’m always looking for ways to improve. To
grow as a teacher, I reflect on my lessons and consider what went well, what
could have been better, and different methods to try in the future. In addition
to self-reflection, I welcome feedback from others—administrators, mentors,
other teachers, and my students. I’ve even participated in Great Teachers,
Great Feedback, which is a virtual coaching service.
I’ve been observed countless times during my teaching career.
My first year teaching I was observed by my mentor multiple times each month
and my program director several times a year. A couple of years later when I
was a part of Teach for America I had advisers in and out of my room on a
regular basis in addition to visits from the principal and vice principals.
While I’ve never enjoyed being observed (who does, right?), I looked forward to
hearing their thoughts and ideas. Whether the feedback was good or bad, I
wanted to hear all about it. I grew into a strong teacher quickly because I was
so eager to learn from others. I’ve always been naturally reflective, but the
comments from administrators, advisers, mentors, and fellow teachers showed me
where to place my concentration.
No matter how often you’re observed and receive feedback,
you won’t grow as a teacher unless you are willing to listen to advice and try
out new ideas. Don’t shut down when an observer shares a criticism. Ask questions about turning things around
instead. True, not all of the advice you’ll
receive will be helpful. For example, one of my observers always told me to
rank my students from highest performers to lowest performers and create an
elaborate seating chart based off of that ranking system. It was such a time
consuming process with seven classes of around 30 students each. However, I
tried it anyway. For several weeks, I used this new seating chart system. When no benefits of the new seating chart
showed themselves I went back to my old arrangements. Out of all of the advice
I received and tried over the years, this was the only one that stands out as impractical.
While the idea didn’t work out, it did get me thinking about other options for
seating charts and table arrangements. Not every idea will be beneficial, but most
of them are worth considering. I’ve discovered a lot of wonderful teaching
methods this way.
Self-reflection and routine observations aren’t the only things
that shaped me into the teacher I am today.
Some of the best feedback came from the people who were in my classroom
every day: my students. Simply watching your students can tell you so much about the
efficacy of your lessons and teaching methods.
I think most teachers can tell when their students are bored. There are
many hard to miss signs there—slouching, open mouths, excessive doodling,
drooling, sleeping, acting out... You can tell when your students are engaged,
eager to learn, and excited. A quick assessment can tell you how much each
student understood the content. There are many informal ways to learn from
your students.
Besides observing students’ behavior and assessing their
work, you can do something as simple as asking questions. Ask your students how
you’re doing. Ask what they liked and didn’t like about a lesson. Ask them what
was clear and what was confusing. Ask them what helps and what doesn’t. Many
students will be hesitant to answer, especially at first. Not many teachers ask
their students’ opinions on lessons and teaching practices. If you can get them
talking, you might be surprised at their insight.
![]() |
| One version of my teacher report card |
When my students “Grade the Teacher” they fill out the
answers to questions on a piece of paper. It’s fairly quick: between five to
ten minutes. You can ask questions about whatever you think would be useful
like classroom management, lesson pacing, types of homework, how students feel
in your class, clearness of expectations, etc.
I often change up the questions each quarter. I always include a portion
about what letter grade I deserve and why. I usually include a question about
what unit they learned the most from and why. If you’re considering letting
your students grade you like this, I recommend you read through the advice
below.
- Explain to the students that you are giving them the feedback form because you want to know how to improve your teaching. Encourage details and examples because those will give you a better idea of how to improve.
- Tell students to focus on your teaching, the lessons, and the classroom environment. Not your clothing choices or appearance or other irrelevant things! When students first started grading me, I got comments about how I’m stylish and have beautiful eyes. Flattering, yes. A little creepy, also yes. Helpful, no.
- Clarify that students should be completely honest but not hurtful. Giving examples of what is and isn’t acceptable is helpful. Example: Mr. Dude sometimes seems mad and yells and it makes students feel uncomfortable. Non-example: Mr. Dude is a mean teacher and everyone hates him.
- If you want, you can have students complete their evaluations anonymously. This might help them be more comfortable being honest. Personally, I like to have students put their names on the evaluations so I can follow up with them if I have any questions or need clarification.
- Consider having a question about the student’s level of effort in class. I’ve found this helps the students consider their role in how class goes on a daily basis, and this causes them to be more fair and reasonable in their evaluation of me.
- This part is hard: Try not to take criticisms personally. Not every student will give you glowing reviews. That’s okay! Remember, you gave them this evaluation to improve and their ideas can often help you with that goal.
- You can use the Grade the Teacher feedback form I created with your students. I use some version of this with my students every quarter. It’s in English and Spanish so all the voices in my classroom are heard.
Want to get feedback from your students? Try my "Grade the Teacher" reflection tool.
![]() |
| Get a "Grade the Teacher" form for your own classroom! |
Are you a middle school science teacher? You might be interested in my newsletter. Sign up for my newsletter here. Just for signing up you'll receive an exclusive freebie that you can't get anywhere else.
A Different Approach to Teaching the Scientific Method
In middle school science, I feel like it is important for
students to really understand the steps of the scientific method. Knowing the
order of the steps isn’t necessarily that important to me, but understanding
each of the steps and what they entail is. I view the steps of the scientific
method more as a way of thinking and problem solving than simply a way to
conduct an experiment. Yes, students should know how to conduct an experiment
correctly and they’ll need the steps for their future science classes. However,
I realize most of my students won’t become scientists and won’t use the steps
outside of school. What all of my students will need, regardless of their
future career choices, is a way to approach and solve the problems that come
their way. The scientific method can help with that, so that’s how I choose to
present it to my students. Consider the
six steps of the scientific method.
- Make an observation and ask a question about it
- Research if needed
- Make a hypothesis
- Test the hypothesis in an experiment
- Record and analyze the data
- Write a conclusion
- Make an observation and ask a question about it: You notice your best friend Ashleigh is being frosty to you but extra friendly to everyone else in your friend group. You ask yourself “Why is Ashleigh mad at me?”
- Research if needed: You ask your friends why Ashleigh is mad. Then you look through your Facebook posts to see if you wrote anything offensive. You see that yesterday you wrote a post saying Ashleigh’s skinny jeans don’t make her look very skinny.
- Make a hypothesis: You’re pretty sure Ashleigh is mad about your post. You think to yourself “If I remove the skinny jeans post and make a new Facebook post about my insensitivity, then Ashleigh will stop being mad at me.”
- Test the hypothesis in an experiment: As soon as you get home from school, you delete the old post and write a new Facebook post about how you made a mean and unfunny joke about a friend and how sorry you are about hurting her feelings. For good measure, you add that you’re a little jealous because you wish you had her curves.
- Record and analyze the data: Within an hour you have 67 likes on your new post and 13 comments praising your apology. You also have one rude comment from your annoying little brother, but he’s stupid and doesn’t matter. You get a message from Ashleigh saying that she forgives you and asks if you want to go shopping this weekend.
- Write a conclusion: You learned you shouldn’t write or say mean things about your friends (or anyone else…except your annoying little brother), and apologizing and admitting you’re wrong is important. In the future, you will treat your friends better.
I think it’s important for students to realize the
scientific method reaches beyond the science classroom. Besides the example
above, I also use the Steps of the Scientific Method Activity with Rappers
Scenarios. (You can learn more about the rapper activity here.) Using examples students
can relate to and seeing how they and others can use the steps in their daily
lives will help them remember the steps and actually understand them. With
practice, they’ll begin to approach problems and work towards solutions differently.
In order to give my students more practice with the steps of
the scientific method, I use card sorting activities. My students enjoy them
and the activities are more hands on than other approaches. In my Teachers Pay
Teachers store you’ll find a set of three card sorting lessons about the
scientific method. Each lesson can be used in multiple ways and comes in both
English and Spanish so I can reach all of my students. (You can purchase the card sorting activities here.)
Lesson Option 1
The first lesson option is a group card sorting
activity. I use this activity as
practice for my students at the beginning of the year when they’re first
learning about the scientific method and again after winter break as a review.
In this activity, the students work together to sort the cards into the six
steps of the scientific method. For each step, there are five cards: a number
card, a step description card, a step explanation card, and two example cards. Take
a look at the picture below to see an example of each type of card.
This activity gets students to understand what is involved
in each step and see what it might look like in an experiment or a problem a
student might encounter. The students can work together and discuss the
groupings of the cards. After all the cards have been grouped, I have my
students complete a two-part reflection sheet individually. The first part is
about how well they would have done by themselves. For part two, the students
pick out key words and phrases from the example cards and explain how those key
words indicate what step the example was a part of. I like it because it gets
the students thinking about why it
represents a step and not just where a card should be placed.
Lesson Option 2
The second lesson option is an individual card sorting
activity. I use this activity instead of
the group activity for my classes that get a little wild when given any kind of
freedom. (It seems like there is always one of those that needs a constant
thumb pushing down on it.) Alternatively, I sometimes use it in all of my
classes as an assessment part way through the scientific method unit. I do this
by having the students glue the cards on a paper to hand in. This lesson option
has a lot of possible purposes: a review, a pre-assessment, formative assessment,
or summative assessment. I’ve used it as a quick activity where students just
sort the cards. And I’ve extended it by having students complete a reflection
sheet where they explain how the examples represent each step.
Lesson Option 3
The third lesson option I use with our interactive
notebooks. The students sort the cards and glue them into their interactive notebooks
instead of taking traditional notes. When they’re done gluing the cards, they
have the steps in order, a description of what the steps contain, and an
example of each step to refer back to in the future. You can use the cards as a part of your
lesson and arrange the cards together as a class. Or you can give your lesson about
the steps and then have the students arrange the cards afterward as a way to
practice what they just learned. If there is time left over in class, I
encourage my students to color their cards in a way that is meaningful for
them. For example, they might color all of the steps in yellow, the
descriptions in red, and the examples in blue.
Or they might color all of the step one cards in red and step two cards orange
and continue on in the order of the rainbow.
While the steps of the scientific method are important for students
to learn for their future classes and possible future science careers, I think
it is more important for students to learn about the steps so they can use them
in their everyday lives as a problem solving technique. When the steps are presented
in this way, alongside of the typical science context, I find this approach
helps students remember the order of the steps, understand why each step is
important, be more motivated to learn the material, and be more likely to use
the steps in real life outside of school. If you're interested in using these any of these card sorting activities in your classroom, take a look at the Steps of the Scientific Method Card Sorting Activities in my TpT store.
Are you a middle school science teacher? Sign up for my newsletter! You'll get a free scientific method resource just for joining.
Including the "Why" Piece in Your Lessons
What if I told you there is an easy way to increase student engagement in your lessons without a fancy song and dance? There is! Students need to know WHY they are learning the material and how it relates to their lives.
Many teachers begin a lesson by sharing the daily plan and objective. For example, the daily plan might be “Take notes on the scientific method and complete the Steps of the Scientific Method Activity.” The objective might be “Students will be able to list the steps of the scientific method in order and identify each step in an experiment.” Before diving into the meat of the lesson, teachers should share one more thing: why students need to know this. When students know why they are learning something and understand how the content actually matters in their lives, they become much more invested in the lesson and retain more information.
For the why piece of the scientific method lesson I might
say something like “The scientific method is a way of looking at problems and
finding solutions. It’s a way of thinking. Being able to think scientifically
will help you solve your own real life problems. It will also help you conduct
experiments in this class and in your future science classes.”
Explaining the why should not look like “The steps of the
scientific method will be on your unit test.” While, yes, that does explain a
reason why students should know something, it is not a meaningful reason for
their lives. They have no reason to be interested in the lesson because they
don’t know why it matters in their lives. They have no reason to retain the
information after the test.
Sometimes it is very easy to come up with a reason why
students should know something. Why should students know about lab safety?
Well, durrrr so they don’t get hurt. Why should students know about the metric
system? They should know the metric system because if they do any kind of
traveling outside of the country they’ll need it for something as basic as
driving the right speed or knowing to pack warm clothes when they look at
the temperature in Celsius.
Unfortunately, it can be difficult to come up with a reason for learning some of the required material students have to learn (which is a whole other topic of conversation). For material like that, I bring in their distant future goals. At the beginning of the year, I have my students complete goal posters about what they want to be in the future and how science can help them reach their goals. (Get the goal posters for free here.)
Some students have goals that relate directly to science—I want
to be a veterinarian. Those are always easy to bring in the why of each lesson.
They need to know biology for how the body works. They need to know chemistry
so they can administer medicine safely and effectively to animals.
Other students have goals that aren’t directly related to
science—“I want to be a professional football player.” For those students,
science is important so they know biology to keep their bodies healthy during
training and prevent injuries. They need to know chemistry so they understand
the dangers of performance-enhancing drugs that could potentially be available.
Also, before sports stars get acknowledged by a professional team they have to
play on a team in high school or college. In order to play on those teams, they
have to be academically eligible. If they can’t understand science well enough to
pass a class, they won’t be playing in any games.
A few students don’t know what they want to be when they
grow up, which is totally fine. For those students, I tell them they should
write something like “I don’t know what I want to be yet, but I do know I want
to have many options when I graduate.” By doing well in science, they won’t be
limiting their career options because they have a weak understanding of science
concepts. If they don’t understand the science concepts in middle school, that
will likely compound in high school. Those gaps of understanding will
negatively affect their ability to succeed in required college science classes and
get the degree needed for their career.
Whenever possible, explain the reasons why students are
learning the material in your lessons. Link the lesson to their lives and
future goals. Get the students in on it too by asking them how the material connects
to them. Ever since I began doing this in my classes, I have noticed my
students are more interested in lessons, ask better questions, have fewer
behavior problems, and retain more of the information.
Beginning of Class Procedure and Routine
It is important to have a routine students can count on
every day. Having the same procedures every day cuts down wasted learning time
significantly. Here is the beginning of class routine I’ve used for the last
three years in my seventh grade science classroom.
During the passing period before every class, I stand
outside of my classroom and greet all of my students. I’m happy to see them
again! Just saying hello, having a short conversation, or noticing a new
haircut helps me build and maintain a positive relationship with each student,
something that’s very important to me. (If you need more ideas on how to build
positive relationships with even the most difficult students read this blog post.) Greeting the students before class sets the tone for a positive learning
environment.
The first thing the students see when they walk into my
classroom is a whiteboard I keep propped right in front of the door so students
cannot miss it. The board lists the beginning of class directions. For example,
it might say
- Hand in Hypothesis Worksheet 1 homework.
- Get your interactive notebook.
- Begin your Do Now.
Because I spent time early in the year establishing the
beginning of class procedures, my students know they should be in their
seats with their interactive notebooks by the time the bell rings. (Find information
on setting up and organizing INBs here.) On the Promethean Board is a PowerPoint
slide showing their Do Now. This is typically what the slide looks like:
While I take roll call and take care of basic
teacher housekeeping items, the students complete their Table of Contents and
write the Do Now questions and answers in their INBs. I require students to write
the questions in their INBs so they have potential test questions and answers to
study in the future. Because the students need to work on their writing skills,
they must answer the questions in complete sentences. The Do Now questions
either review the previous lesson’s content or introduce the new content. To
ensure students stay on task, I use a stopwatch to time their Do Now. Typically,
I provide five minutes to complete the Do Now and add a minute or two if
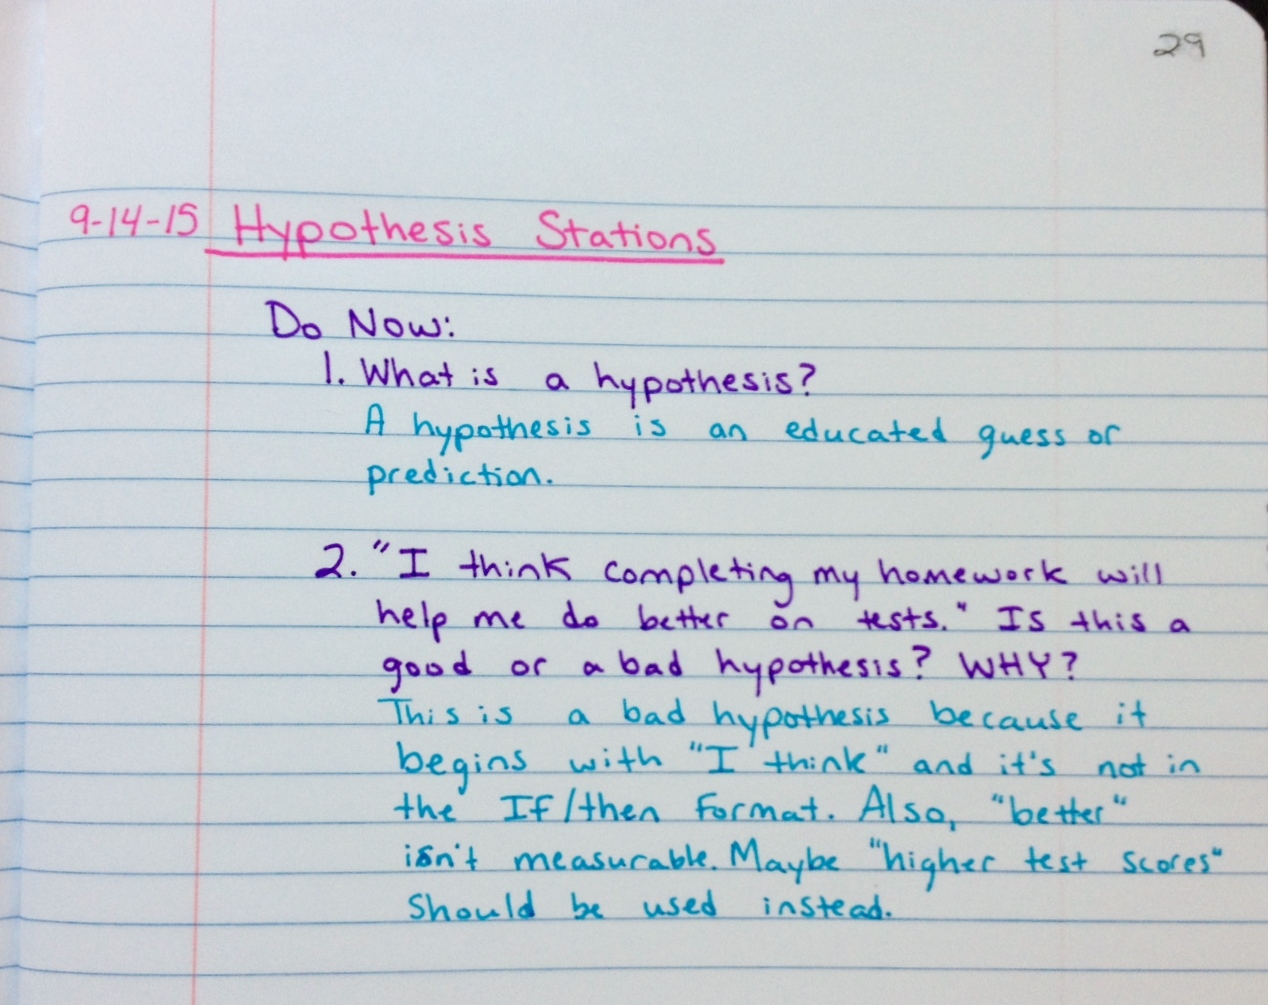
needed. Here is a completed Do Now:
When time is up, we discuss the answers together as a class.
Students add to or change their answers as needed. Then we go over the day’s
objective, rationale, and plan so students know what they are learning, why
they are learning it, and how they’ll be learning it.
Well, that’s my beginning of class routine. It takes less
than ten minutes, but it gets the class started without wasting learning time.
The students’ minds get activated right away and ready to learn new content.
Thanks go to Desktop Learning Adventures and the ELA Buffet for setting up this blog hop.
Subscribe to:
Posts (Atom)